Tiếp tục về blade template trong Laravel, bài này mình sẽ giới thiệu với mọi người về stack, Injection, tạo directive và cache view trong Blade template.
10. Stack trong Blade template.
Blade template cung cấp cho chúng ta directive @push để thực thi việc đẩy các data vào @stack trong view. Các bạn có thể hiểm nôm na là mỗi khi các bạn sử dụng @push thì data đó sẽ được đẩy thêm vào @stack.
VD:
- resources/views/layouts/app.blade.php
<html>
<head>
    <title>App Name - @yield('title', 'Toidicode.com')</title>
</head>
<body>

<div class="container">
    @yield('content')
</div>

@stack('scripts')

</body>
</html>
- resources/views/home.blade.php
@extends('layouts.app')

@push('scripts', '<script>alert("Hello!")</script>')

@push('scripts')
    <script>
        alert("Hello again!")
    </script>
@endpush
- routes/web.php
use Illuminate\Support\Facades\Route;

Route::get('/', function () {
    return view('home');
})->name('home');
Kết quả: Dưới dạng view-source
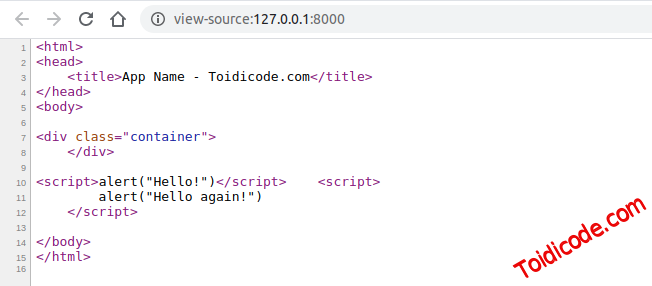
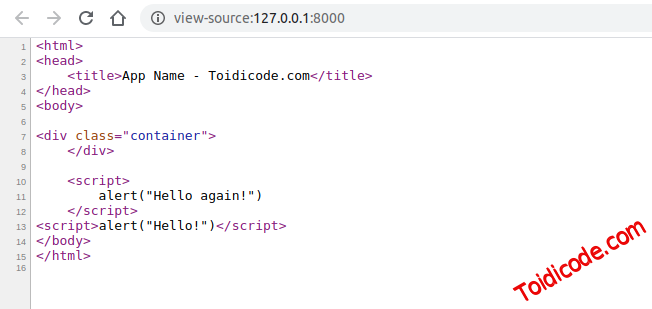
Như các bạn đã thấy thì mỗi lần sử dụng @push thì data sẽ được đẩy xuống dưới @stack. Tuy nhiên trong một số trường hợp bạn muốn đẩy lên phía đầu của @stack thì bạn có thể sử dụng @prepend directive.
VD: Mình sẽ thay @push bằng @prepend trong resources/views/home.blade.php.
@extends('layouts.app')

@prepend('scripts', '<script>alert("Hello!")</script>')

@prepend('scripts')
    <script>
        alert("Hello again!")
    </script>
@endprepend
Kết quả: Dưới dạng view-source
11. Sevice Jnjection trong Blade template.
Nếu như bạn muốn jnject một service, object nào đó trong blade. Bạn có thể sử dụng @inject directive với cú pháp sau:
@inject('variableName', 'ClassPath')
Trong đó:
variableNamelà biến sẽ được assign khi inject thành công.ClassPathlà namespace của class các bạn muốn inject.
VD:
@inject('metrics', 'App\Services\MetricsService')

<div>
    Monthly Revenue: {{ $metrics->monthlyRevenue() }}.
</div>
Đoạn code trên sẽ tương ứng với code sau:
@php($metrics = app(App\Services\MetricsService::class))

<div>
    Monthly Revenue: {{ $metrics->monthlyRevenue() }}.
</div>
12. Tạo directive trong Blade.
Trong một số trường hợp bạn muốn tạo thêm directive của riêng mình thì Laravel cũng hỗ trợ bạn tạo mới directive một cách hết sức đơn giản với cú pháp như sau:
use Illuminate\Support\Facades\Blade;

Blade::directive($directiveName, function ($value) {
    // code
});
Trong đó:
$directiveNamelà tên directive mà bạn muốn tạo.$valuelà giá trị mà bạn truyền vào khi sử dụng directive.
Lưu ý: Để việc tạo mới directive hoạt động tốt nhất có thể thì bạn nên đưa code vào trong provider.
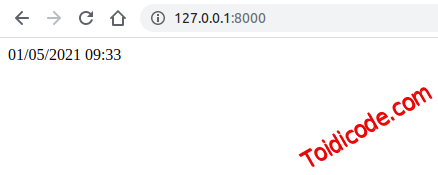
VD: Tạo mới direcive in ra date với format "d-m-y h:i".
- app/Providers/AppServiceProvider.php
<?php

namespace App\Providers;

use Illuminate\Support\Facades\Blade;
use Illuminate\Support\ServiceProvider;

class AppServiceProvider extends ServiceProvider
{
    /**
     * Register any application services.
     *
     * @return void
     */
    public function register()
    {
        //
    }

    /**
     * Bootstrap any application services.
     *
     * @return void
     */
    public function boot()
    {
        Blade::directive('datetime', function ($expression) {
            return "<?php echo ($expression)->format('d-m-y h:i'); ?>";
        });
    }
}
- resources/views/home.blade.php
@datetime(now())
- routes/web.php
use Illuminate\Support\Facades\Route;

Route::get('/', function () {
    return view('home');
})->name('home');
Kết quả:
13. Tạo mới câu lệnh if trong Blade template.
Tương tự như đối với directive thông thường, bạn cũng có thể tạo mới if directive cho riêng bạn bằng cách sử dụng if method trong Blade object (Illuminate\Support\Facades\Blade).
VD:
- app/Providers/AppServiceProvider.php
use Illuminate\Support\Facades\Blade;

/**
 * Bootstrap any application services.
 *
 * @return void
 */
public function boot()
{
    Blade::if('disk', function ($value) {
        return config('filesystems.default') === $value;
    });
}
- resources/views/home.blade.php
@disk('local')
    <!-- The application is using the local disk... -->
@elsedisk('s3')
    <!-- The application is using the s3 disk... -->
@else
    <!-- The application is using some other disk... -->
@enddisk

@unlessdisk('local')
    <!-- The application is not using the local disk... -->
@enddisk
14. Cache view trong Laravel.
Mặc định, Laravel luôn luôn cache lại các bản view đã được compile vào trong storage/framework/views sau đó mỗi request gọi đến laravel sẽ kiểm tra xem cache đó đã tồn tại hoặc hết hạn hay chưa? Nếu cache đã hết hạn (thời gian thay đổi file blade lớn hơn với thời gian thay đổi file cache) hoặc file cache chưa tồn tại thì laravel sẽ thực hiện việc compile blade vào cache lại.
Quá trình compile này có thể làm cho ứng dụng của bạn chậm đi một chút (có thể không đáng kể). Chính vì điều này laravel có cung cấp cho chúng ta 2 command để cache và clear cache view trong một số trường hợp cần thiết.
Cache: php artisan view:cache
Clear cache: php artisan view:clear
15. Lời kết.
Viết đến đây cũng khá dài về blade template trong Laravel rồi. Laravel còn một số các khái niệm nâng cao liên quan đến component trong blade template nữa mình không trình bày trong series này.
Đăng ký nhận tin.
Chúng tôi chỉ gửi tối đa 2 lần trên 1 tháng. Tuyên bố không spam mail!




Hana
4 năm trước